


Jewelry that blends your tenacity with the softer side of your soul
I create pieces that examine the duality that exists in life and among the objects and environment that surround us. With a fascination in finding balance between two opposing elements, I explore pairs, opposites, and partnerships with the union of textures, colors and materials. Metals embedded with softened surface textures, matching the dark with the light, or the industrial with the organic, my work celebrates the duet that exists in you.
Featured collection: Earrings

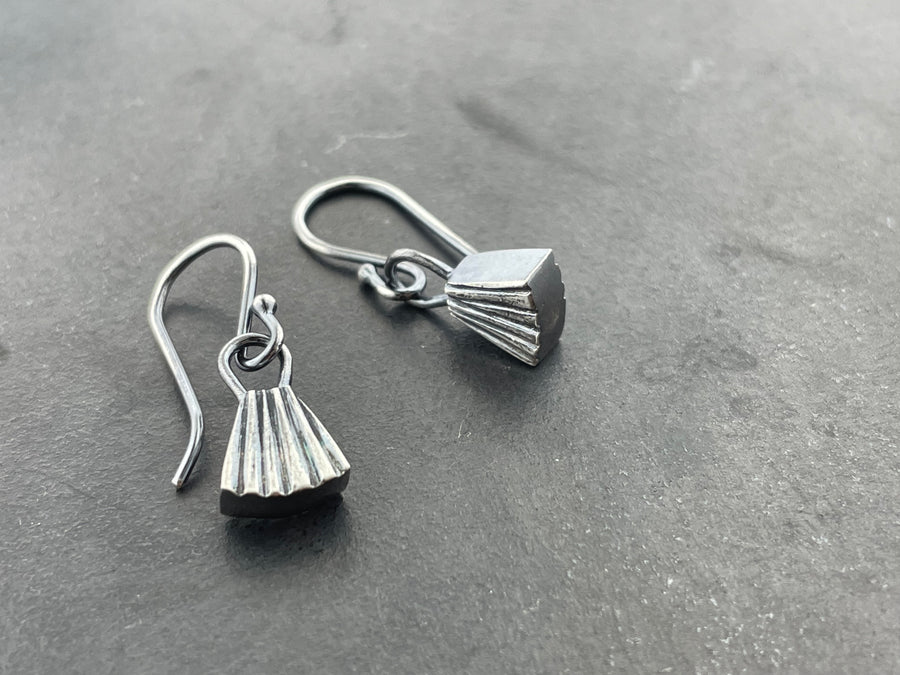


Tiny Deco Earrings
Sold Out
tiny sterling silver pendant art deco inspired oxidized, tiny, and awesome! 1" long
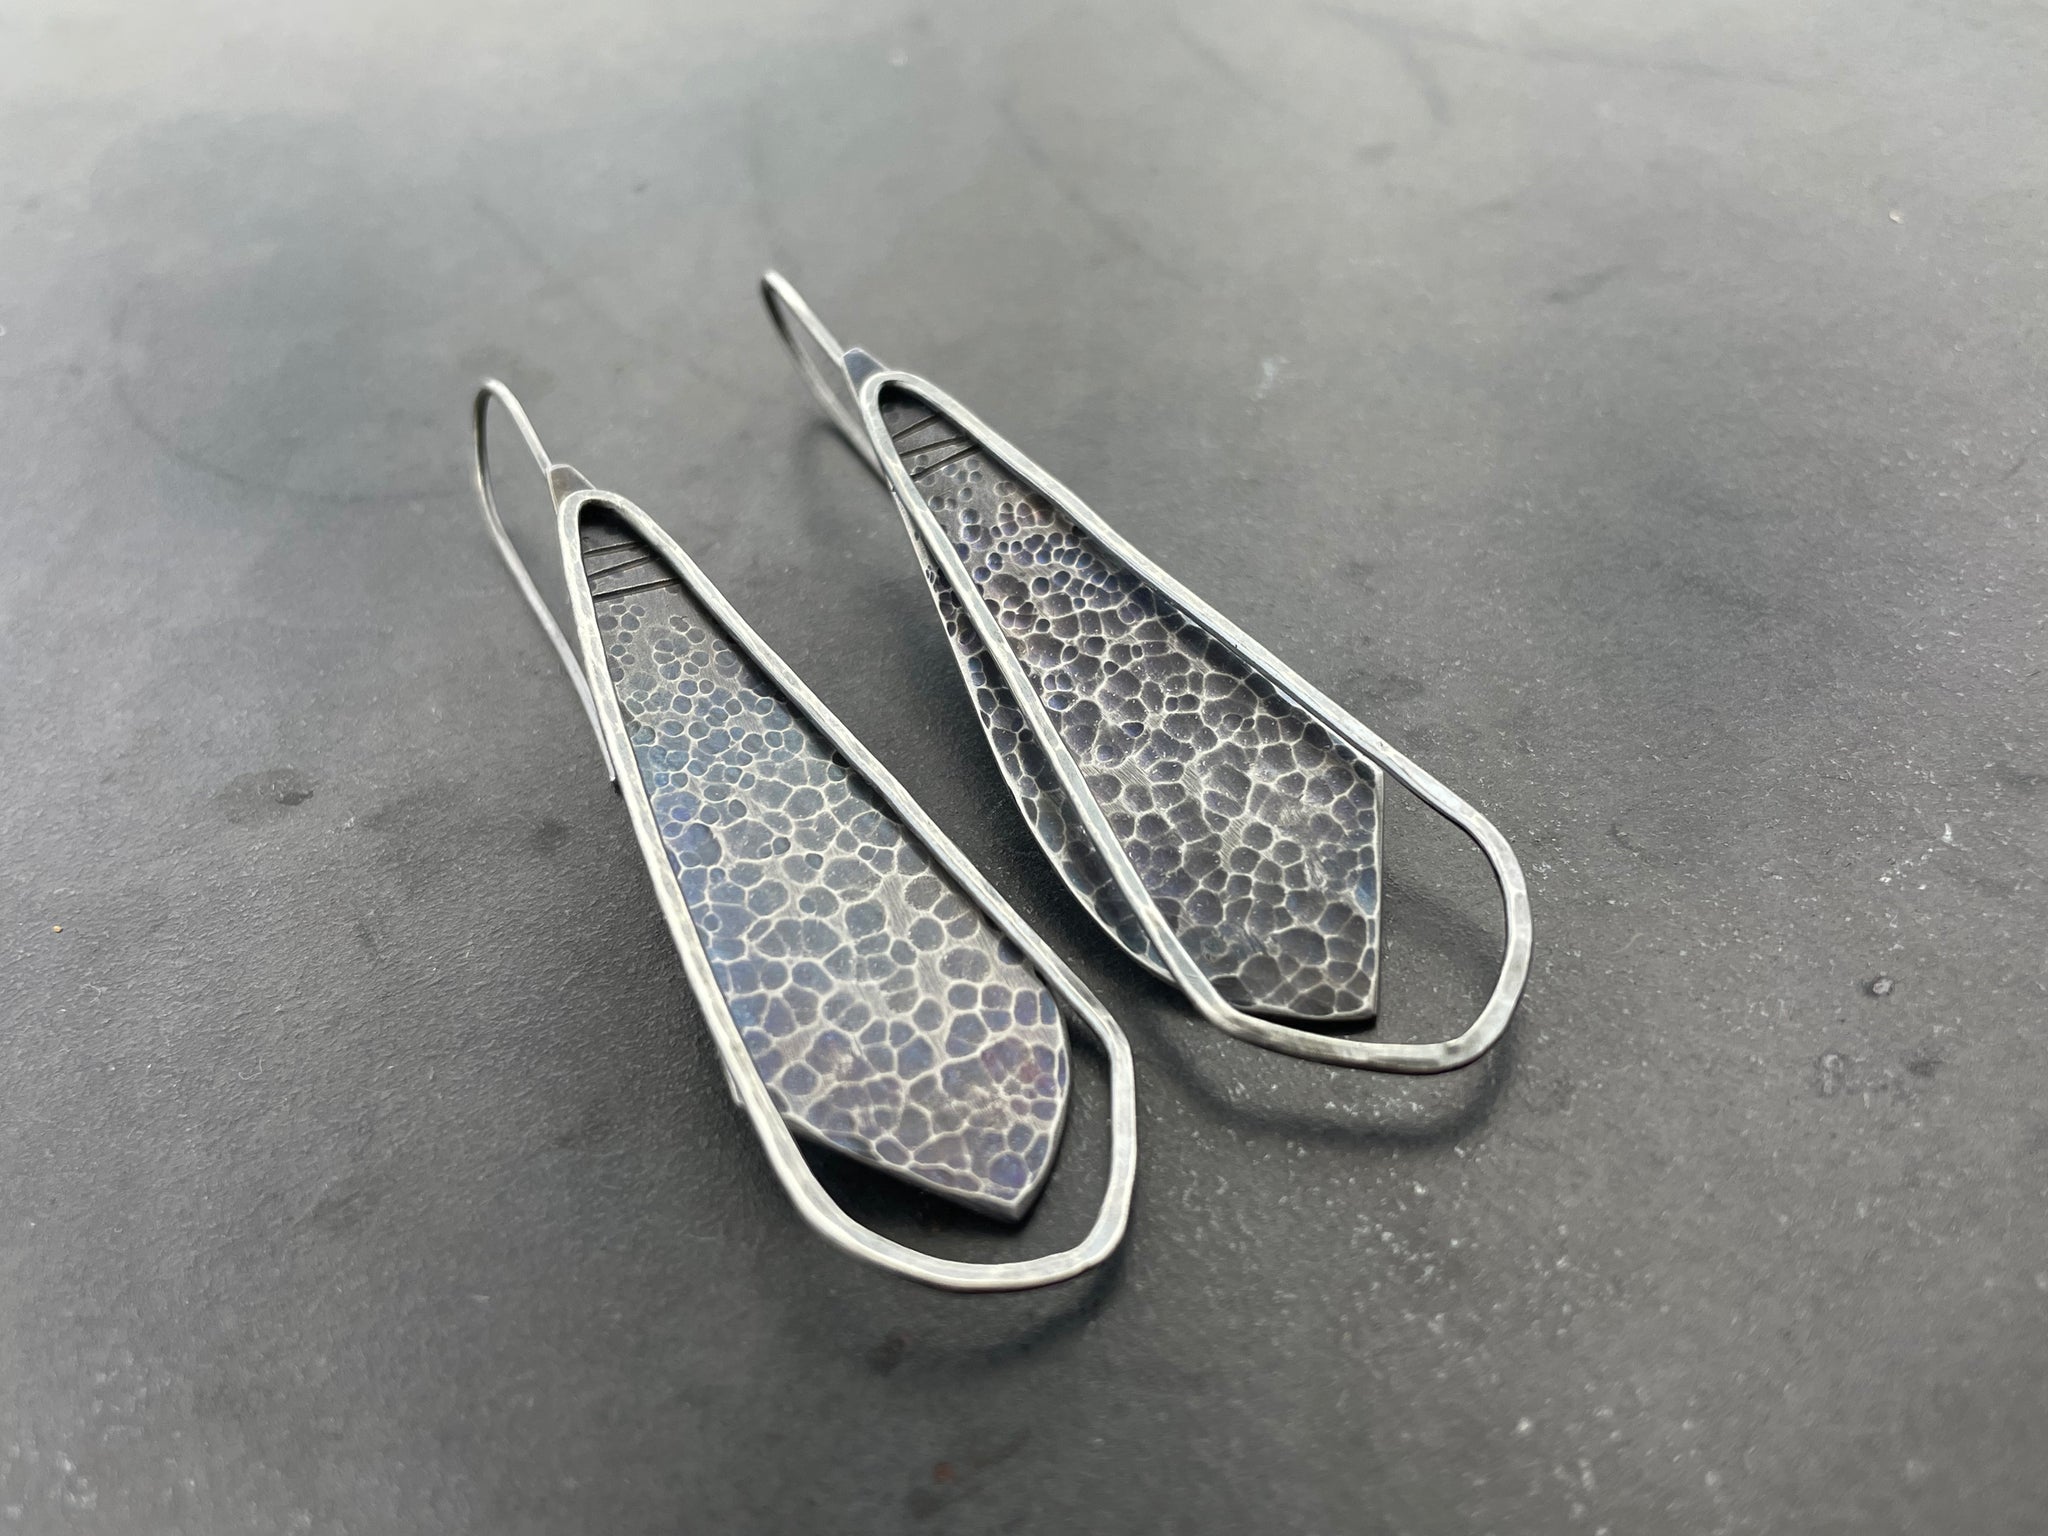
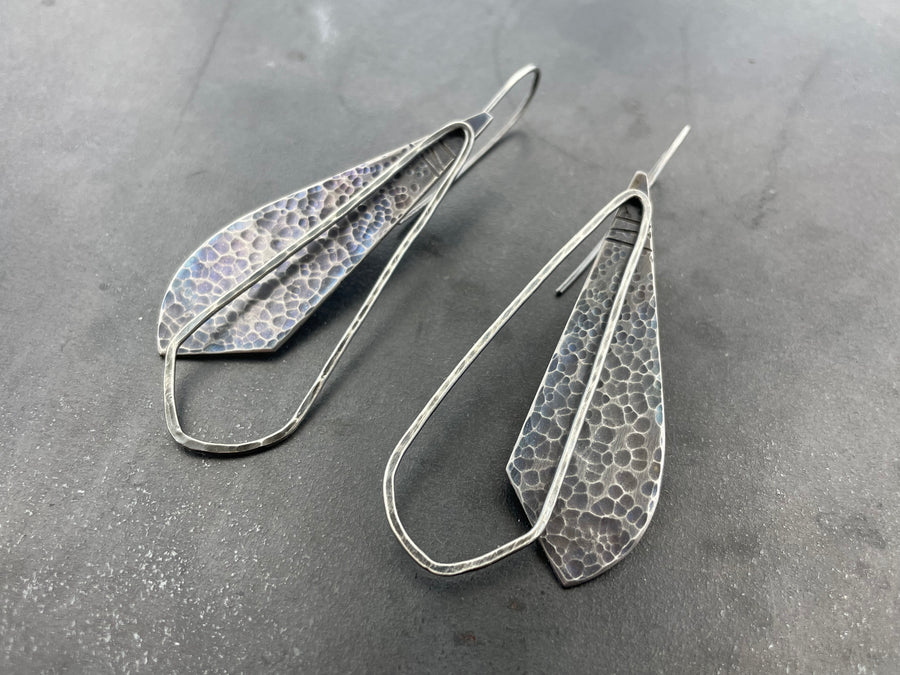
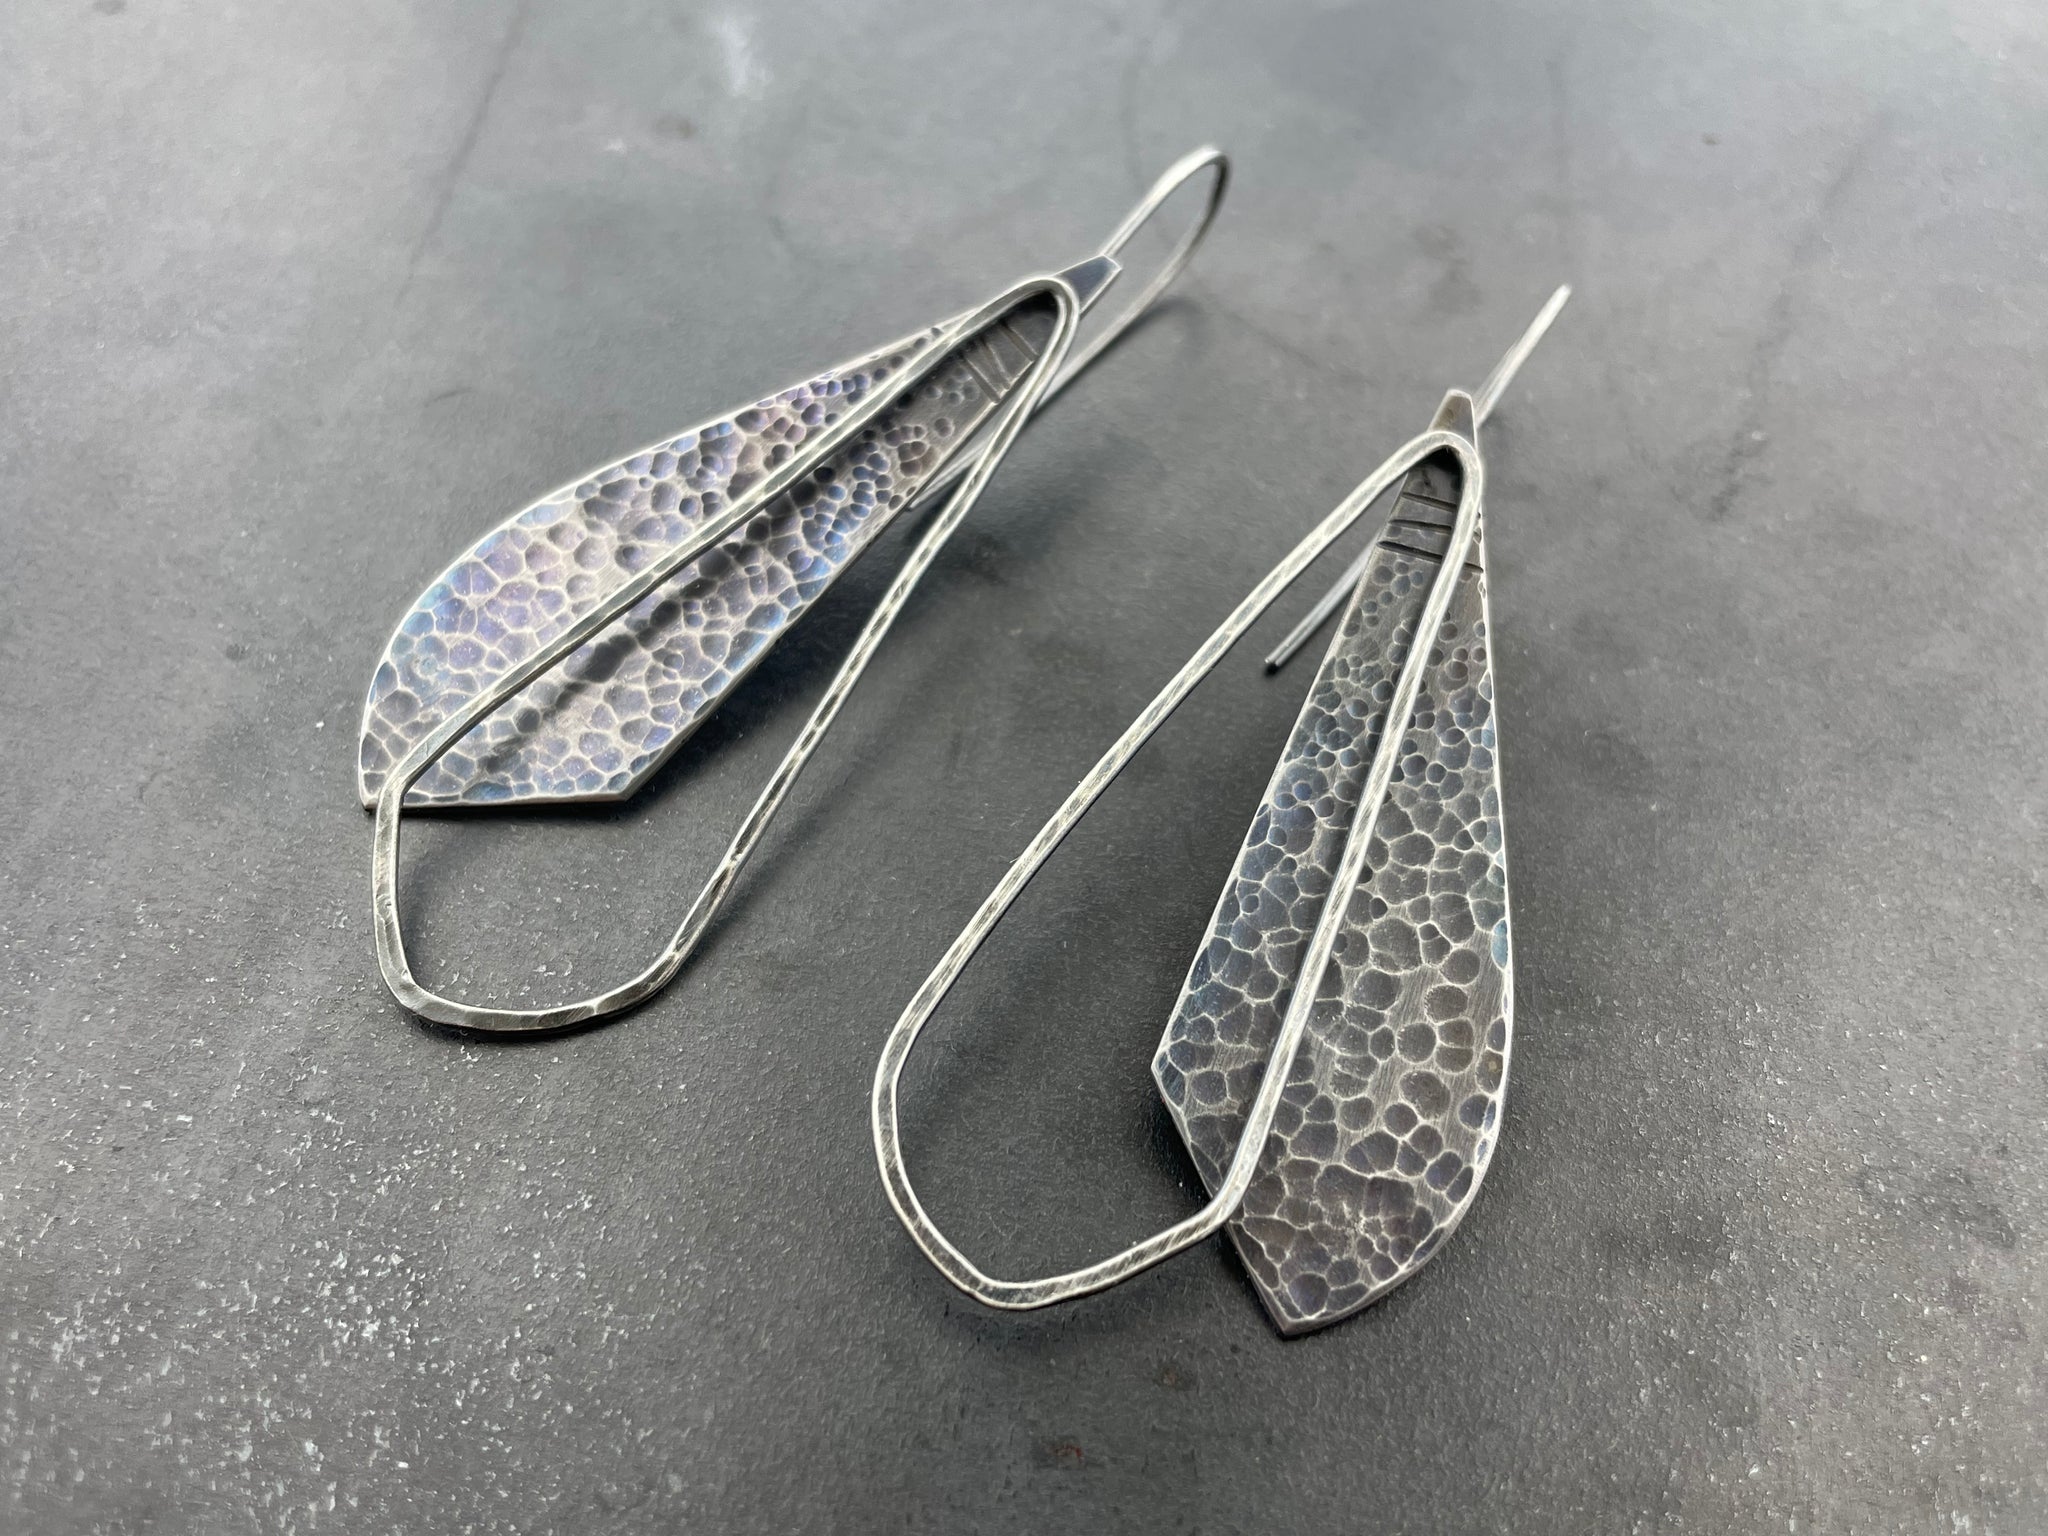
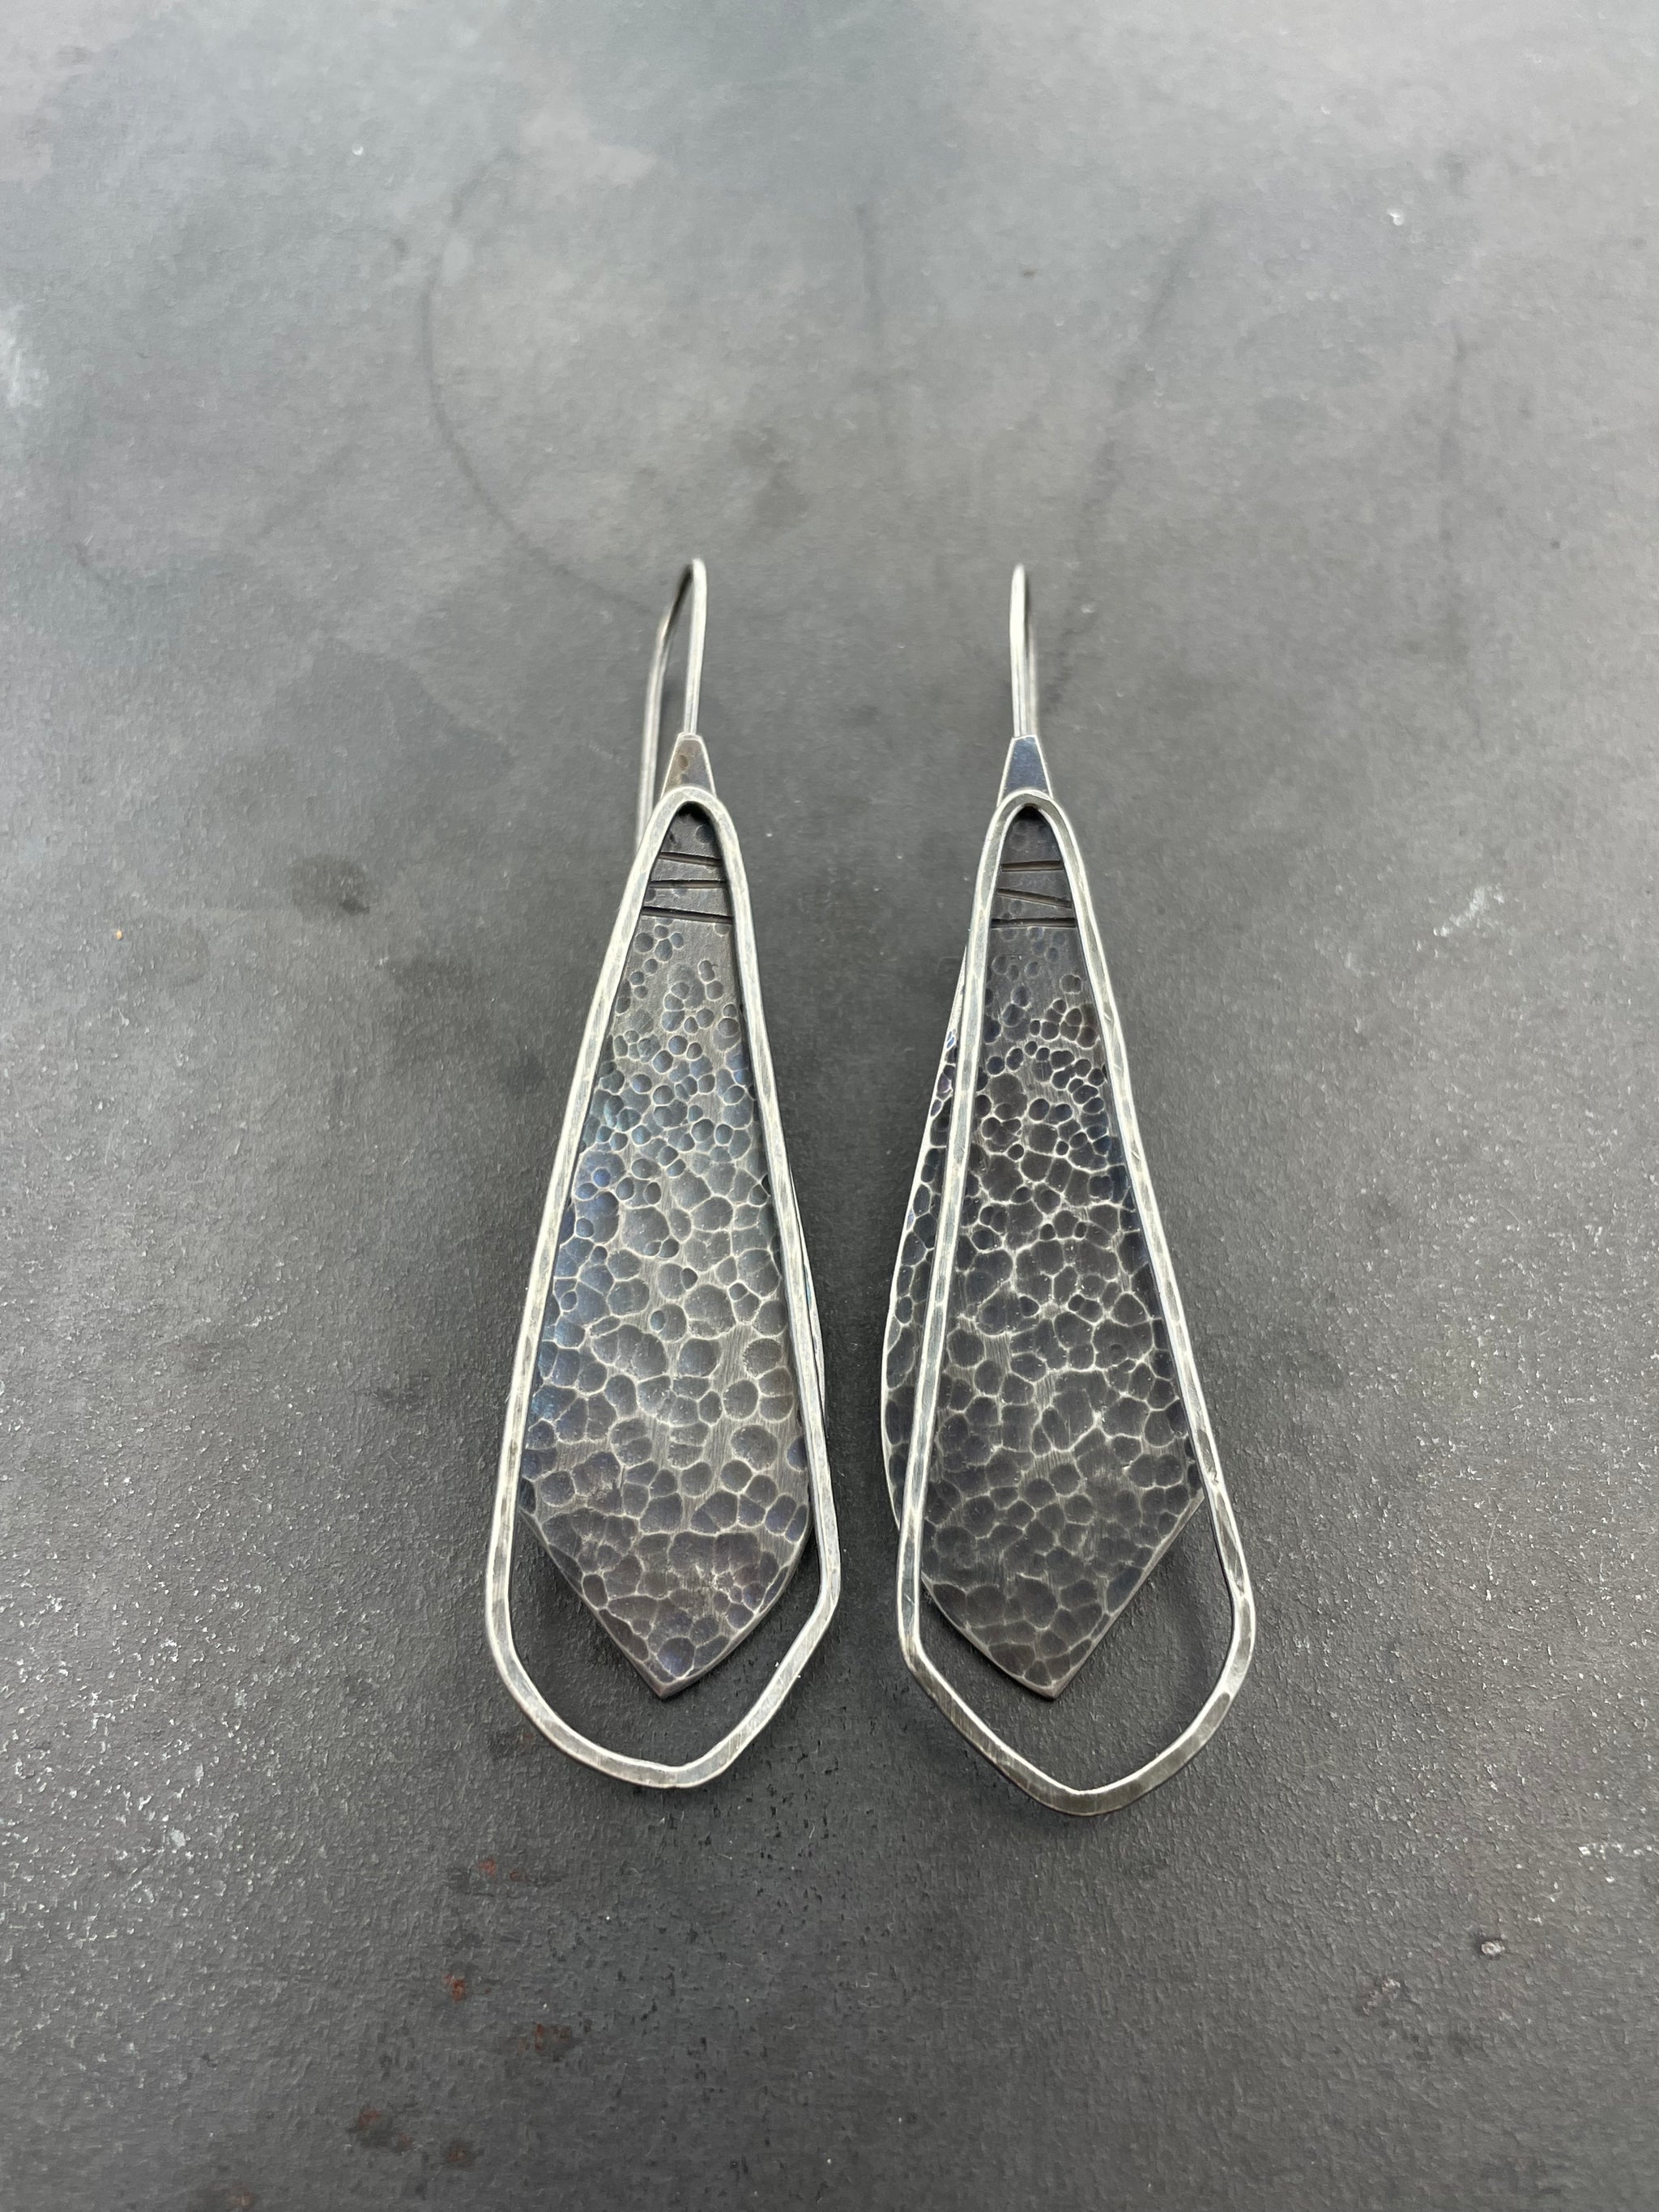
Silhouette Earrings VI
$140.00
titanium swinging back plate hammered texture and patina on titanium sterling silver open front and earwires oxidized and brushed approximately 3" in length

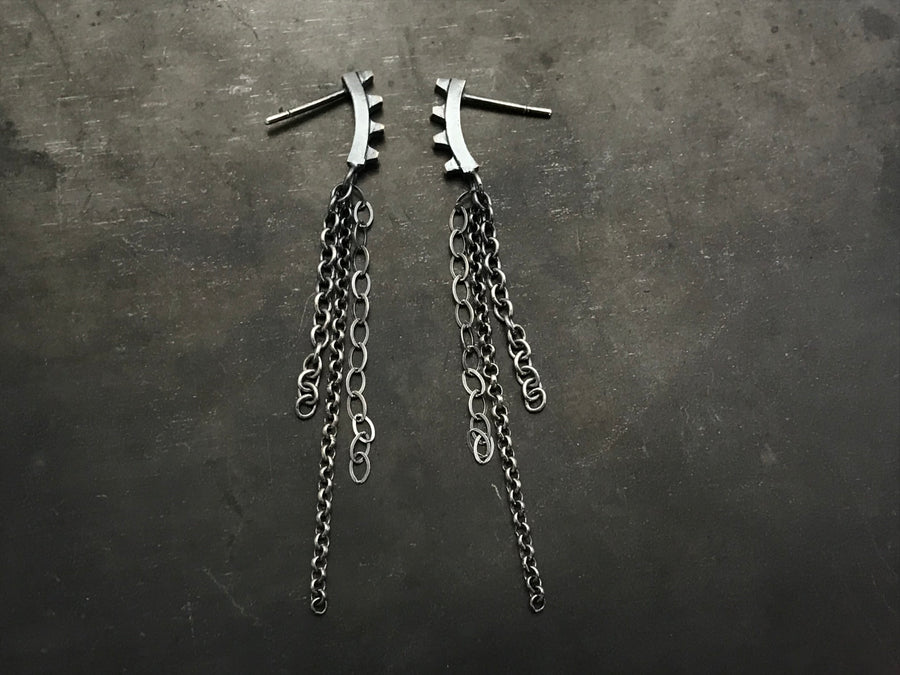


Velocity Chandelier studs
$115.00
sterling silver curved velocity element studs with chain three styles of chain for the chandelier oxidized 2 3/8" long


